Featured

A Closer Look at Winter Damage

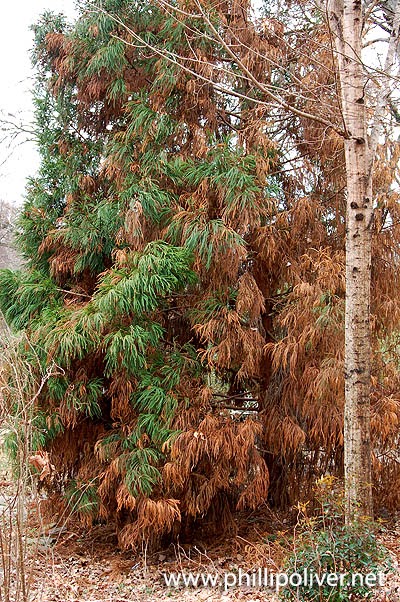
But first, take a look at this gorgeous rainbow that we had on Friday! The five-day stretch of warm temperatures last week really jump-started the garden. Now that plants are putting out new growth, it is easier to see what kind of damage the winter left. Back in mid-January, we experienced five straight days of below-freezing temperatures. This caused much damage in Portland and areas where frigid winds were a factor. Here, we were fortunate to not get the wind and the cold temperatures were dampened by a blanket of snow. That said, it was a tough time for the garden and there are noticeable casualties but no outright deaths that I have seen. The bottlebrush ( Callistemon 'Woodlander's Red') did not like the cold at all. It was planted six years ago, in the north-facing garden no less, and I've not experienced die-back on it until now. A local expert said to cut it all the way back so that is what I did. If it doesn't make it, I won't be too distraught. It is

Sowing Seeds


I have never had much success with growing plants from seeds. Part of the problem is that I always end up a big wad of seedlings that are a nightmare to thin. I figured there had to be a way to spread seeds evenly so I went over to YouTube and did a search. I found a variety of interesting methods. One popular method that kept popping up involved using sand. I do not have any so then I came across a nifty little tool called a hopper. I don't have one of those either but it looks like something worth checking into. Then I came across a technique using tissue paper, something I did have on hand.

 
You spread a strip of tissue paper (if it is windy, you will have to place rocks or clumps of soil on it so that it will not blow away). Press it down evenly with your hands. 

You still have to be extremely careful when spreading your seeds but at least now you can see them. They want to roll together so this does involve some manual manipulation.
 
After you have broadcast the seeds, sprinkle soil lightly over the tissue. The tissue will eventually deteriorate and hopefully this will help you avoid over-seeding. At least I hope so - I will let you know how this turns out.

Here is what I have been planting this week:

Lettuce "Arctic King Butterhead" "Heirloom" "Rouge D'Hiver" and "Burpee Bibb"
Cabbage "Brunswick"
Mustard "Tendergreen"
Radish "Saxa II"
Carrot "Kuroda Long 8 Inch"

Text and photos by Phillip Oliver, Dirt Therapy

Comments

  1. What a clever idea, Phillip. Thanks for sharing.

    ReplyDelete
  2. I have never had much success with seeds either, except for certain flowers such as marigold and cosmos, which are good even for kindergarteners. Good luck with yours!

    ReplyDelete
  3. When we plant lettuce , mustard or other greens we just spread out the seeds in square groupings, not rows. Thin them
    as we eat them.

    ReplyDelete
  4. I had never heard of this method. Interesting. I will be curious to hear of your results. Have you made a raised bed here or is your planting in the ground?

    ReplyDelete
  5. Those first seeds of the season in the ground. Always a good feeling. I hope you have success with your plantings.

    ReplyDelete
  6. Hi Phillip :-)
    You and I have any friend in common: Alabama Eve (aka Sunnyside Up Eve)!
    She sent me a message saying that her great loss (you moving away from Alabama) was my gain (you moving to Washington) because I live in Oregon, about 30 minutes west of Portland. Welcome to the PNW!
    I love to garden, too, and I look forward to reading about your experiences gardening in zone 8a! :-)

    ReplyDelete
  7. This is a great idea! You made your own seed tape! I hope everything grows well for you. :o)

    ReplyDelete
  8. This looks like such a clever idea! I don't have much trouble with larger seeds like green beans or beets, but those tiny seeds can be difficult. I scattered some poppy and larkspur seeds over the snow a few weeks ago, as I usually do, but I'm pretty sure a whole bunch of them wound up in the same two-inch spot:)

    ReplyDelete

Post a Comment

Popular Posts