Featured

A Closer Look at Winter Damage

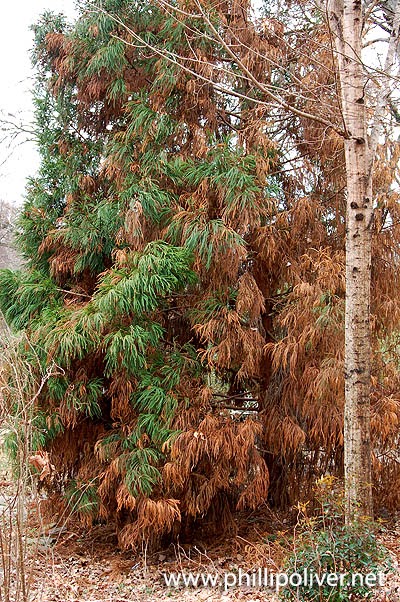
But first, take a look at this gorgeous rainbow that we had on Friday! The five-day stretch of warm temperatures last week really jump-started the garden. Now that plants are putting out new growth, it is easier to see what kind of damage the winter left. Back in mid-January, we experienced five straight days of below-freezing temperatures. This caused much damage in Portland and areas where frigid winds were a factor. Here, we were fortunate to not get the wind and the cold temperatures were dampened by a blanket of snow. That said, it was a tough time for the garden and there are noticeable casualties but no outright deaths that I have seen. The bottlebrush ( Callistemon 'Woodlander's Red') did not like the cold at all. It was planted six years ago, in the north-facing garden no less, and I've not experienced die-back on it until now. A local expert said to cut it all the way back so that is what I did. If it doesn't make it, I won't be too distraught. It is

First big project finished

I've finished my first major project of the year - redoing a pathway that runs alongside our patio. I had never been satisfied with it. The stones I had initially used were uneven and too thick to walk on comfortably. The dwarf mondo grass planted between the stones was full of weeds. Inspired by Pam at Digging, I decided to do it all over again, this time with large flat stones and making it a solid walk. I removed the old stones, the grass and weeds and dug down about six inches. I spread a layer of sand before laying the rock and used a sand topping to fill in the cracks between the stones. The sand topping (a Quickrete product) hardens after you wet it.


Like almost every project I attempt, I soon realized that it was going to be difficult to level because it goes slightly downhill (I am terrible at stuff like this!). I then decided to make the pathway in three sections with step-ups. I replaced the mondo grass between the patio and the path. I think I'm happy with the end result. It is not professional looking by any means but like I said, this is not my forte.




Comments

  1. Oh my gosh, that's amazing! Great job. Want to come help with our path??

    ReplyDelete
  2. Wow! I think this looks great. I know this must have taken a great deal of time and effort, but the result is fabulous. Don't sell yourself short, I wish I could do as well.

    Jan Always Growing

    ReplyDelete
  3. I think it looks fantastic, Phillip. Well done! I had not heard of that Quickcrete sand, but it sounds like a good solution.

    ReplyDelete
  4. Phillip that looks great! We'll be starting a similar patio project in the next couple months. Do you have any advice to give?

    ReplyDelete
  5. I think it looks amazing! We're working on pathways right now too and you've inspired me.

    ReplyDelete
  6. Thanks everybody! Dave, be sure and read Pam's post at Digging because she has some good advice. My biggest problem is always getting things level. This time I took my time and did it all in stages. After I dug it out, I spread the sand and let it sit for a few days before laying the rock, etc. If you use the sand topping product, you have to be really careful - you can't just pour it over the stones and sweep it in or you will have a major mess. Carefully pour it between the cracks and when you wet it, use a fine mist from the hose so the water won't be too forceful. I hope this helps!

    ReplyDelete
  7. It looks pretty professional to me!

    ReplyDelete
  8. Wow, impressively large flagstones. You must have had a difficult time moving and placing those. Looks great!

    ReplyDelete
  9. Fabulous. I love your garden. Thanks for providing eye candy and inspiration! Karen H

    ReplyDelete
  10. Not professional? Phillip, I think it’s wonderful and I would proudly have it in our garden. You did an excellent job as always.

    ReplyDelete
  11. WOW!!! I think you did a fantastic job!!! Looks awesome!!

    ReplyDelete
  12. Phillip: What a great looking walkway. You must be so pleased. You really can't see the change in elevation looking from the first direction. If that becomes a 'tripping' problem you could edge the lips of the changes in grade with a small 4x4x4 belgium block for a visual clue to the change and a finished edge. It looks wonderful. You must be so pleased. I loved your 'petals on the walk' post also. Thanks for visiting over at ledge and gardens. I hope to see you there and visit you more often.

    ReplyDelete
  13. Oh WOW! You're so right--what a difference it makes to have that... expanse... of stone for the pathway. Lovely--great job!

    ReplyDelete
  14. Phillip, what a beautiful walk. Thanks for the tip about being careful with the special sand. It looks very professional and really plays up the surrounding plants, trees and shrubs. It also must be a joy to walk on. Thanks for sharing this.
    I am always gone on the weekends and get behind on the blog reading. This new set up of Stuart's at Blotanical with the fave's only posts lets them stay up longer so I can find the older ones when I have a minute.

    ReplyDelete
  15. Nicely done, Phillip! I love that it still has a naturalistic look, but easier to maintain. Good advice about letting the sand settle a few days. It sets off the existing plants well! Time to throw a garden party and show off your handiwork!

    ReplyDelete
  16. I think it looks VERY professional! You did a great job, and I thought it looked nice enough in the "before" picture. But now it looks...wow.

    ReplyDelete
  17. I think it looks fabulous. Perfectionist much??

    ReplyDelete

Post a Comment

Popular Posts